Connecting to Wifi
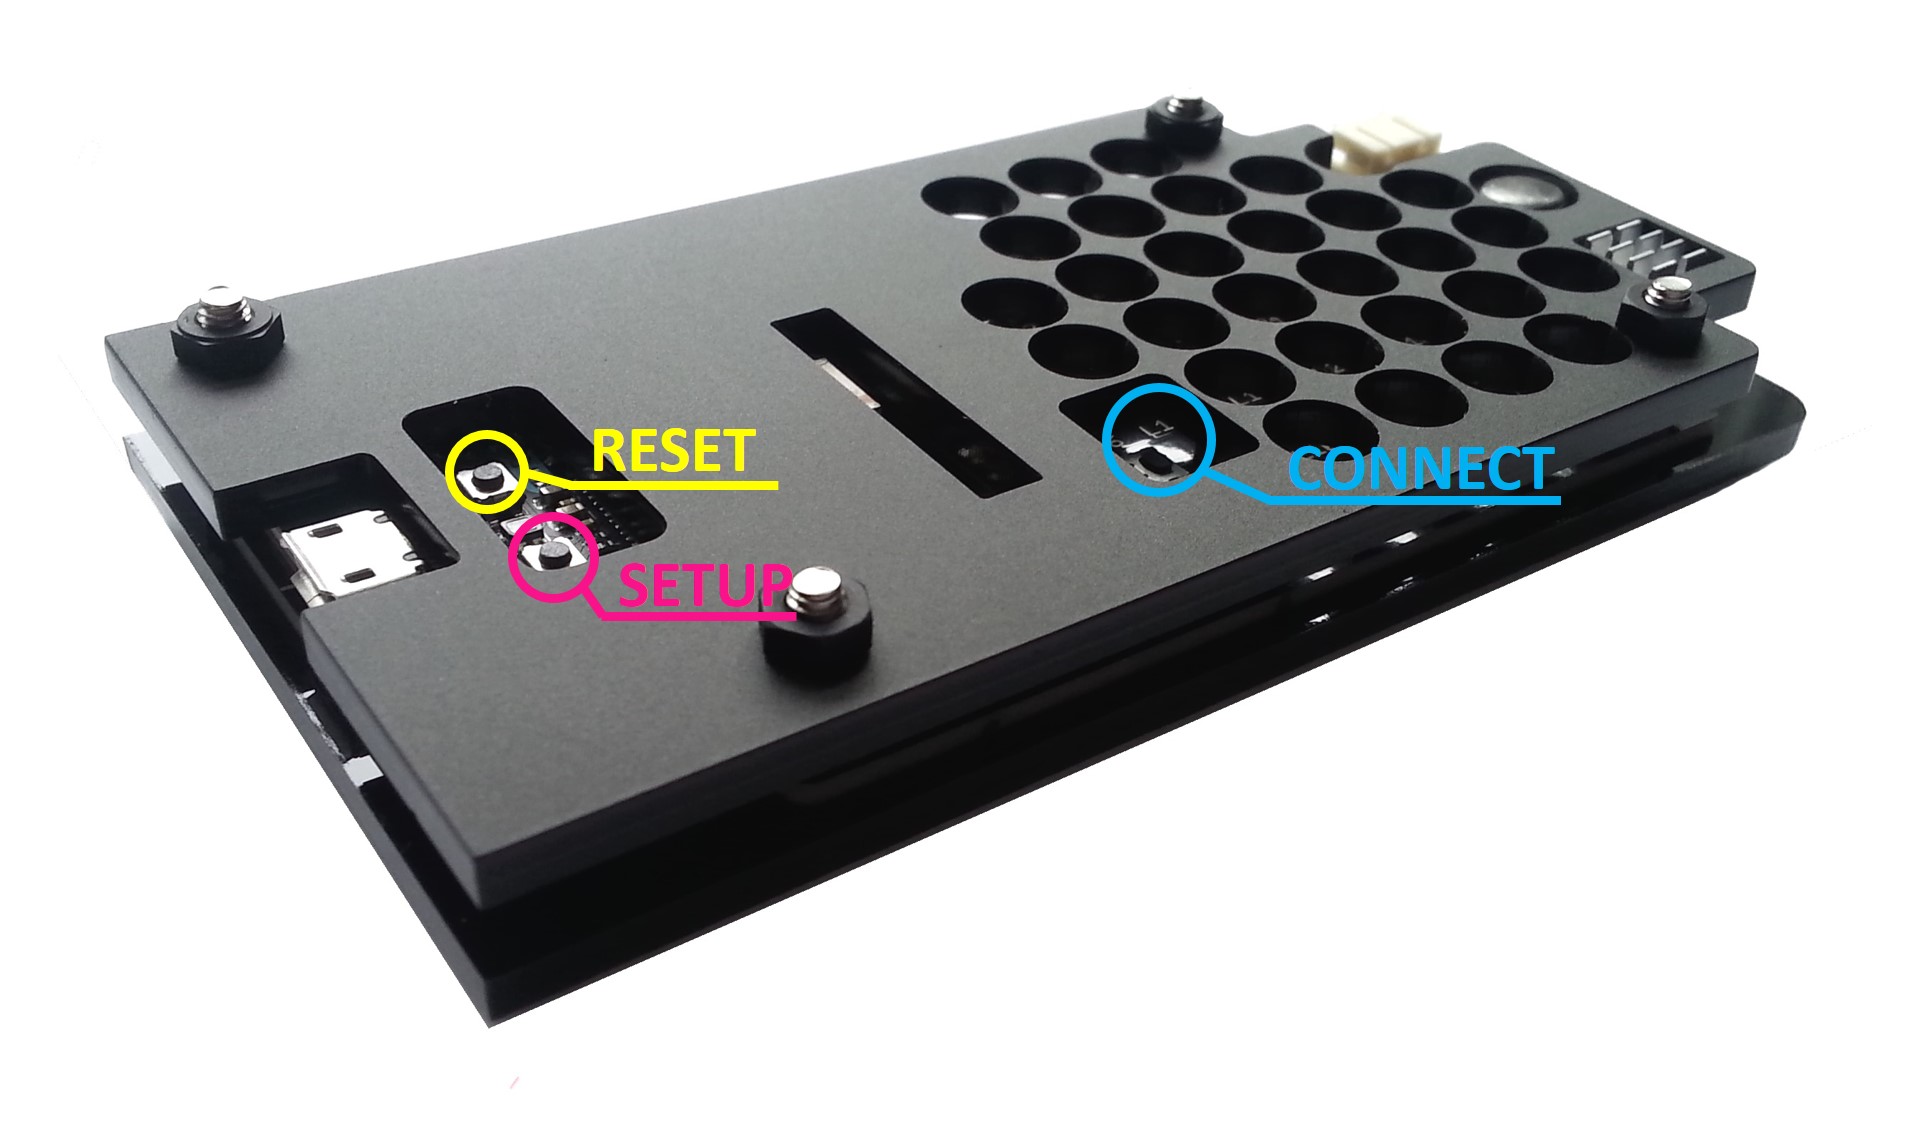
Connecting MarkOne to the internet is useful for remote on/off control over the internet, and also for uploading new beacon firmware. When MarkOne is powered on, it will immediately begin operating offline. A blue D7 LED indicates that the IR LEDs are active. The 'breathing white' main LED indicates that MarkOne is powered but NOT connected to the internet. This is the default mode of operation. Pressing the CONNECT button will initiate an attempt to connect to the internet. But first, wifi credentials must be loaded onto Mark One.
Loading Wifi Credentials onto MarkOne:
-> Power on MarkOne. The main LED should be 'breathing white', and the D7 LED should be blue. Hold the SETUP button for three seconds to put MarkOne into Listening Mode. The main LED should be blinking blue.
-> Go tohttp://photonsoftap.meteor.com. Follow the instructions to load wifi credentials onto the Photon module on MarkOne.
-> Press the RESET button to reset MarkOne. Then, press the CONNECT button (Press hard. The button is stiff). The main LED should flash green, indicating that it is trying to connect to the internet. When MarkOne is successfully connected to the internet, the main LED will be breathing cyan.
Alternative Method:
If the above method does not work, you can use the Particle CLI to load wifi credentials. First, install Particle CLI (see the 'Claiming a MarkOne' section). Then, use the wifi setup command below. The MarkOne unit should be put in Listening Mode by holding the SETUP button for three seconds. The main LED should be blinking blue.
$ particle setup wifiErasing Wifi Networks:
The wifi networks stored on your MarkOne can be deleted by holding the SETUP button for 10 seconds. You should see the main LED flash blue rapidly.
Connecting to Internet on Startup:
If you want MarkOne to automatically connect to the internet when powered on, you should connect pins A0 and A1 (i.e., solder a wire/jumper between the two pins).

Updated 8 months ago
